Fine-tune Models#
Although CLIP-as-service has provided you a list of pre-trained models, you can also fine-tune your models. This guide will show you how to use Finetuner to fine-tune models and use them in CLIP-as-service.
For installation and basic usage of Finetuner, please refer to Finetuner documentation. You can also learn more details about fine-tuning CLIP.
This tutorial requires finetuner >=v0.6.4, clip_server >=v0.6.0.
Prepare Training Data#
Finetuner accepts training data and evaluation data in the form of DocumentArray.
The training data for CLIP is a list of (text, image) pairs.
Each pair is stored in a Document which wraps two chunks with image and text modality respectively.
You can push the resulting DocumentArray to the cloud using the push() method.
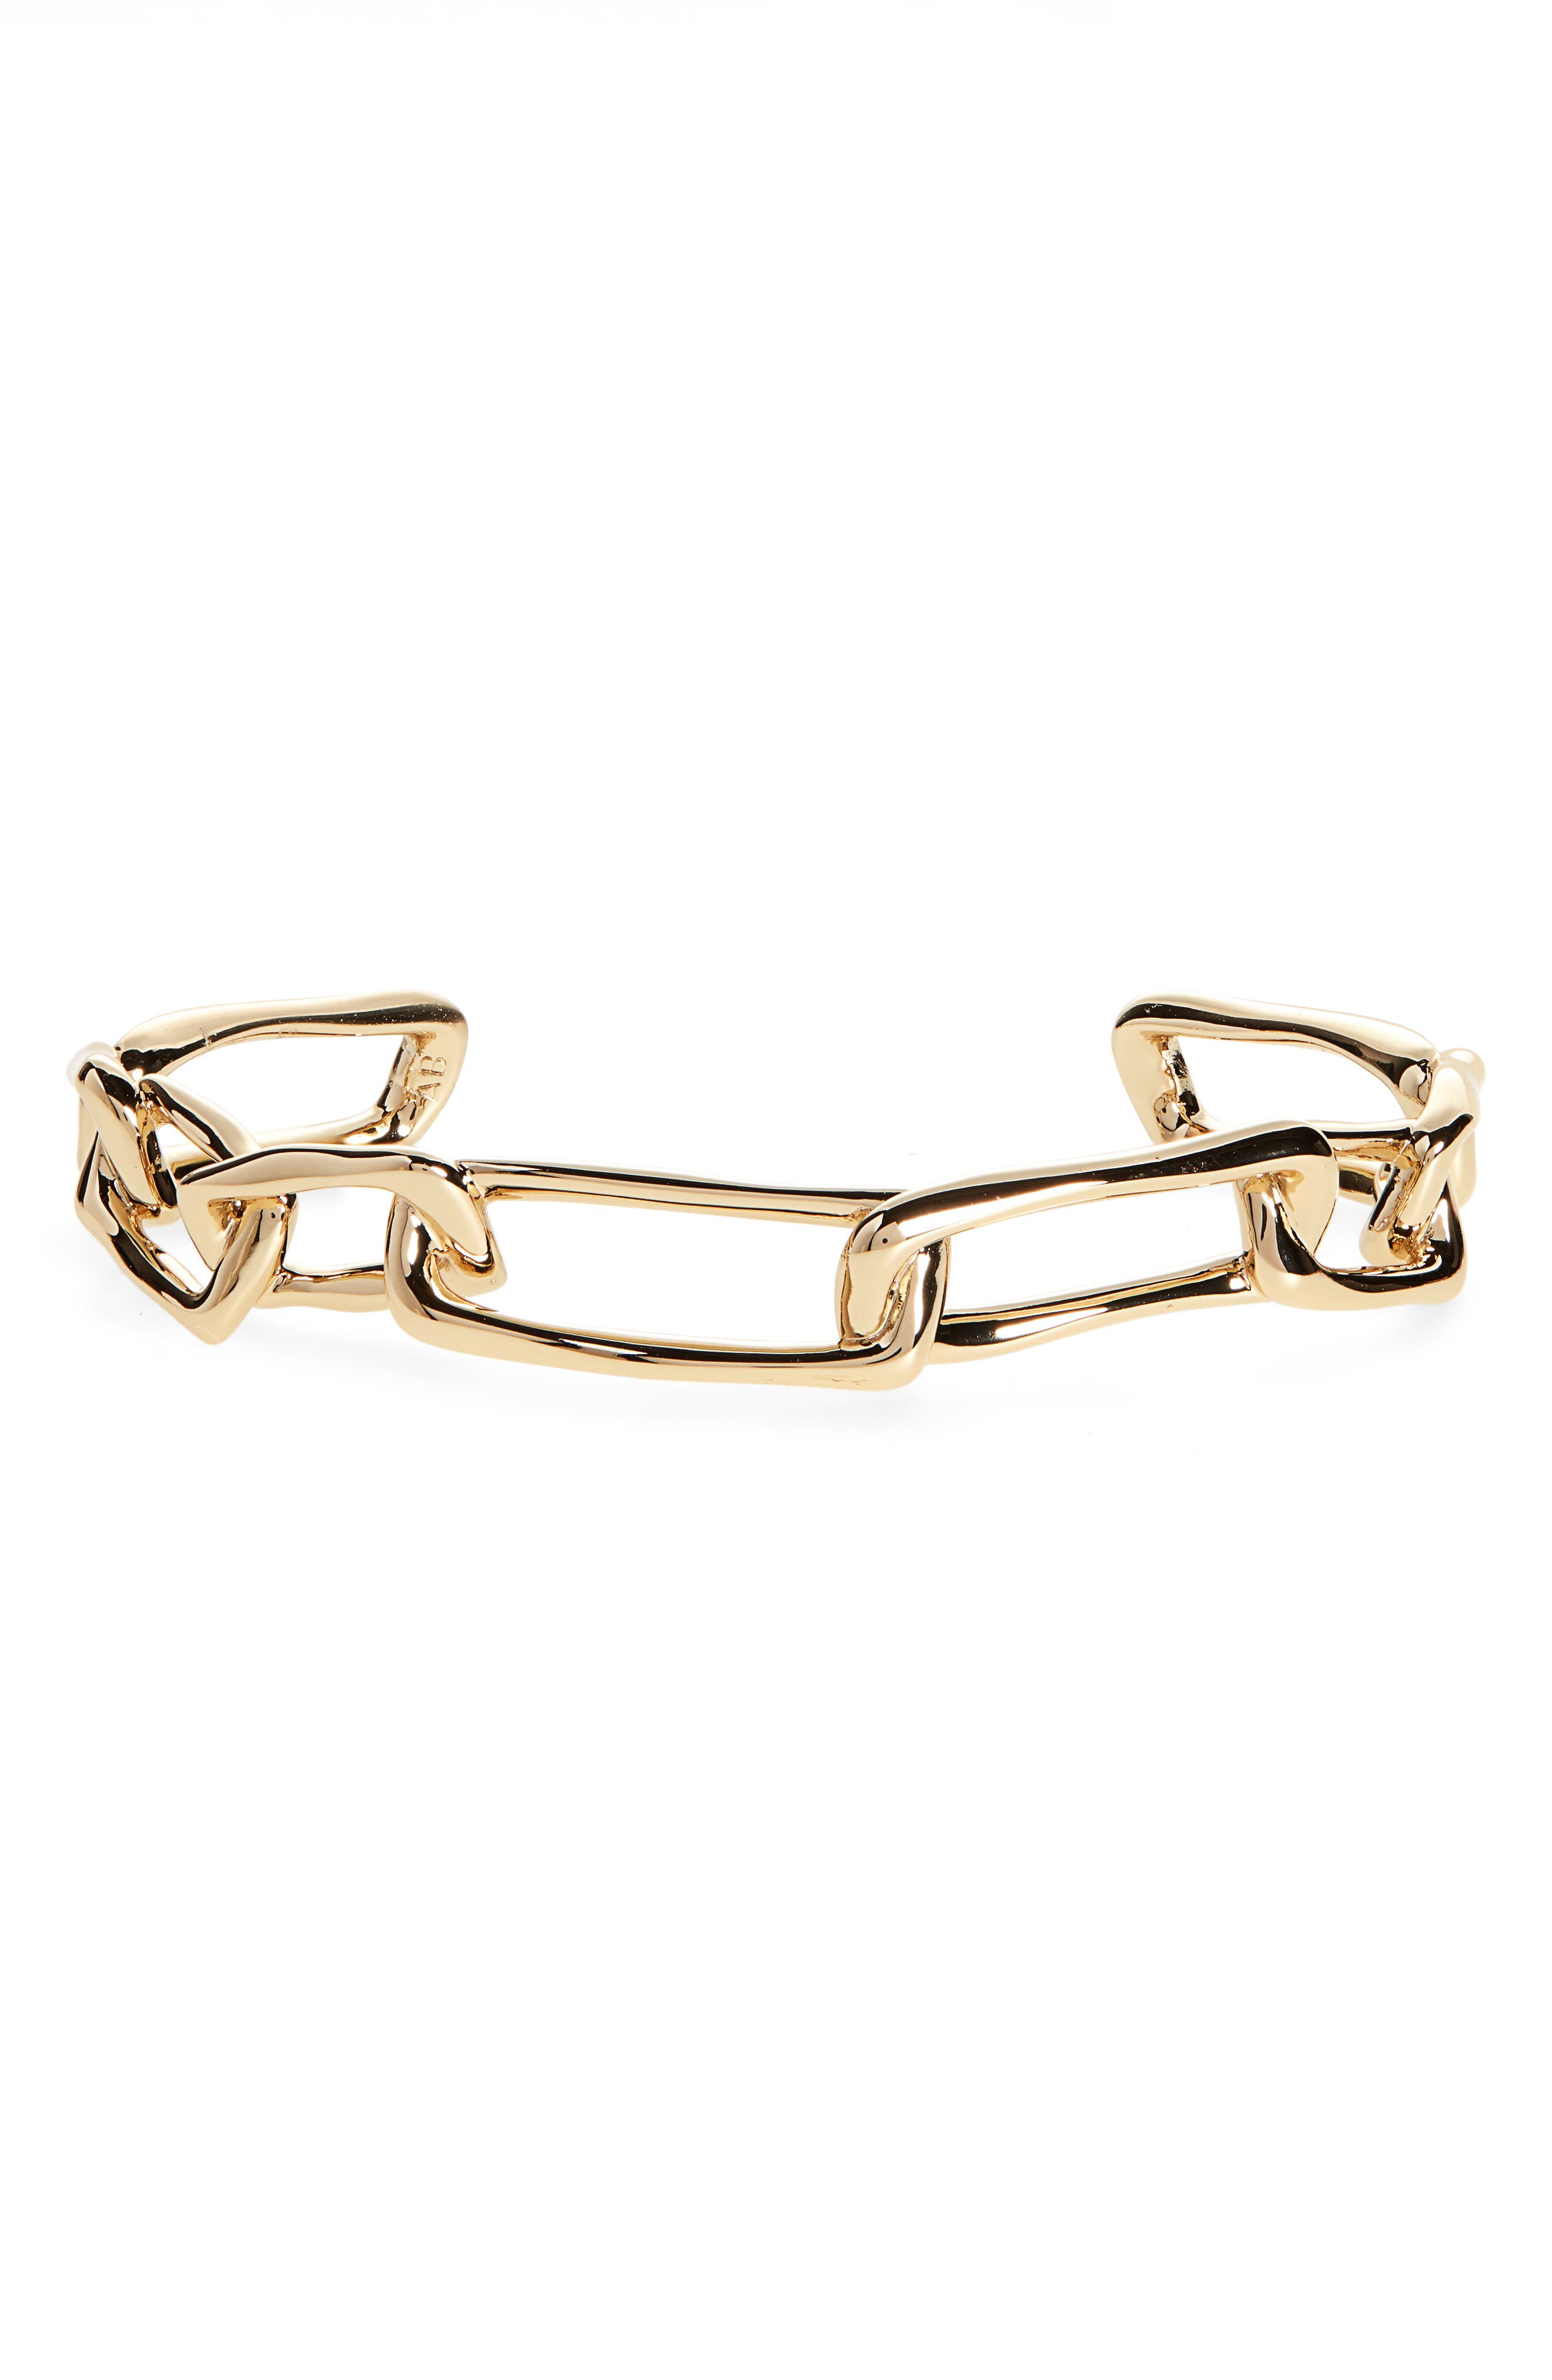
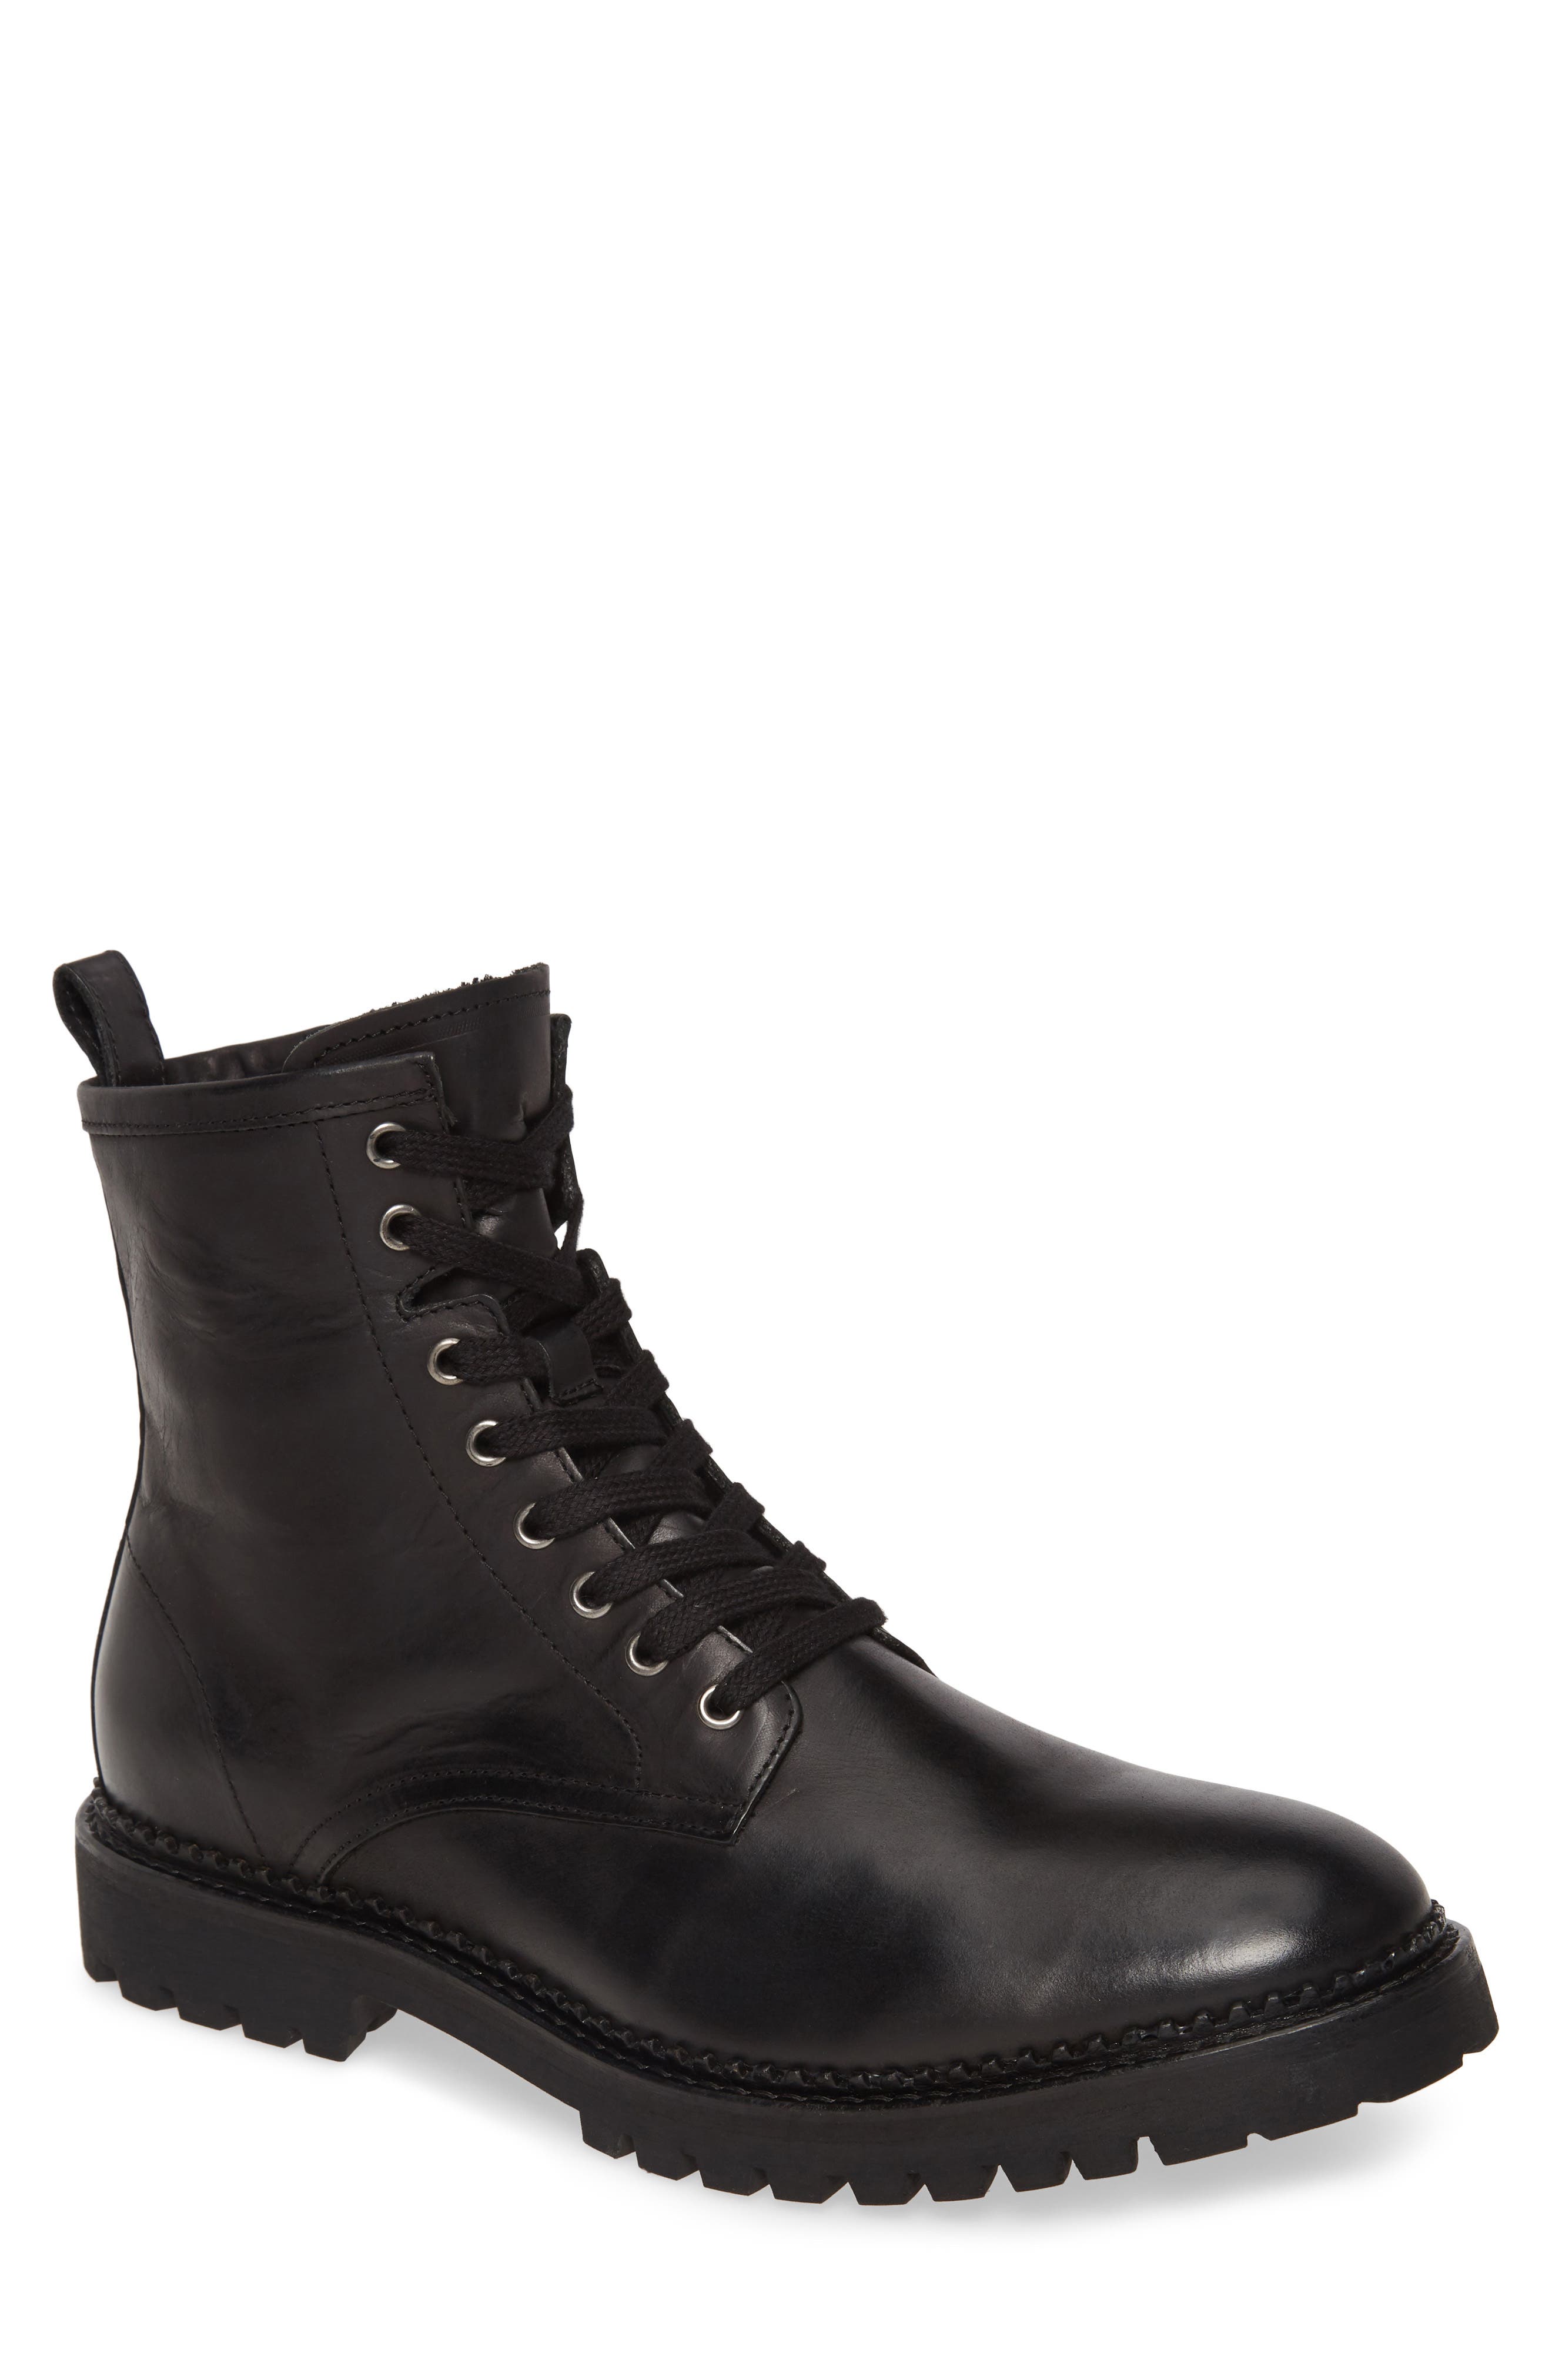
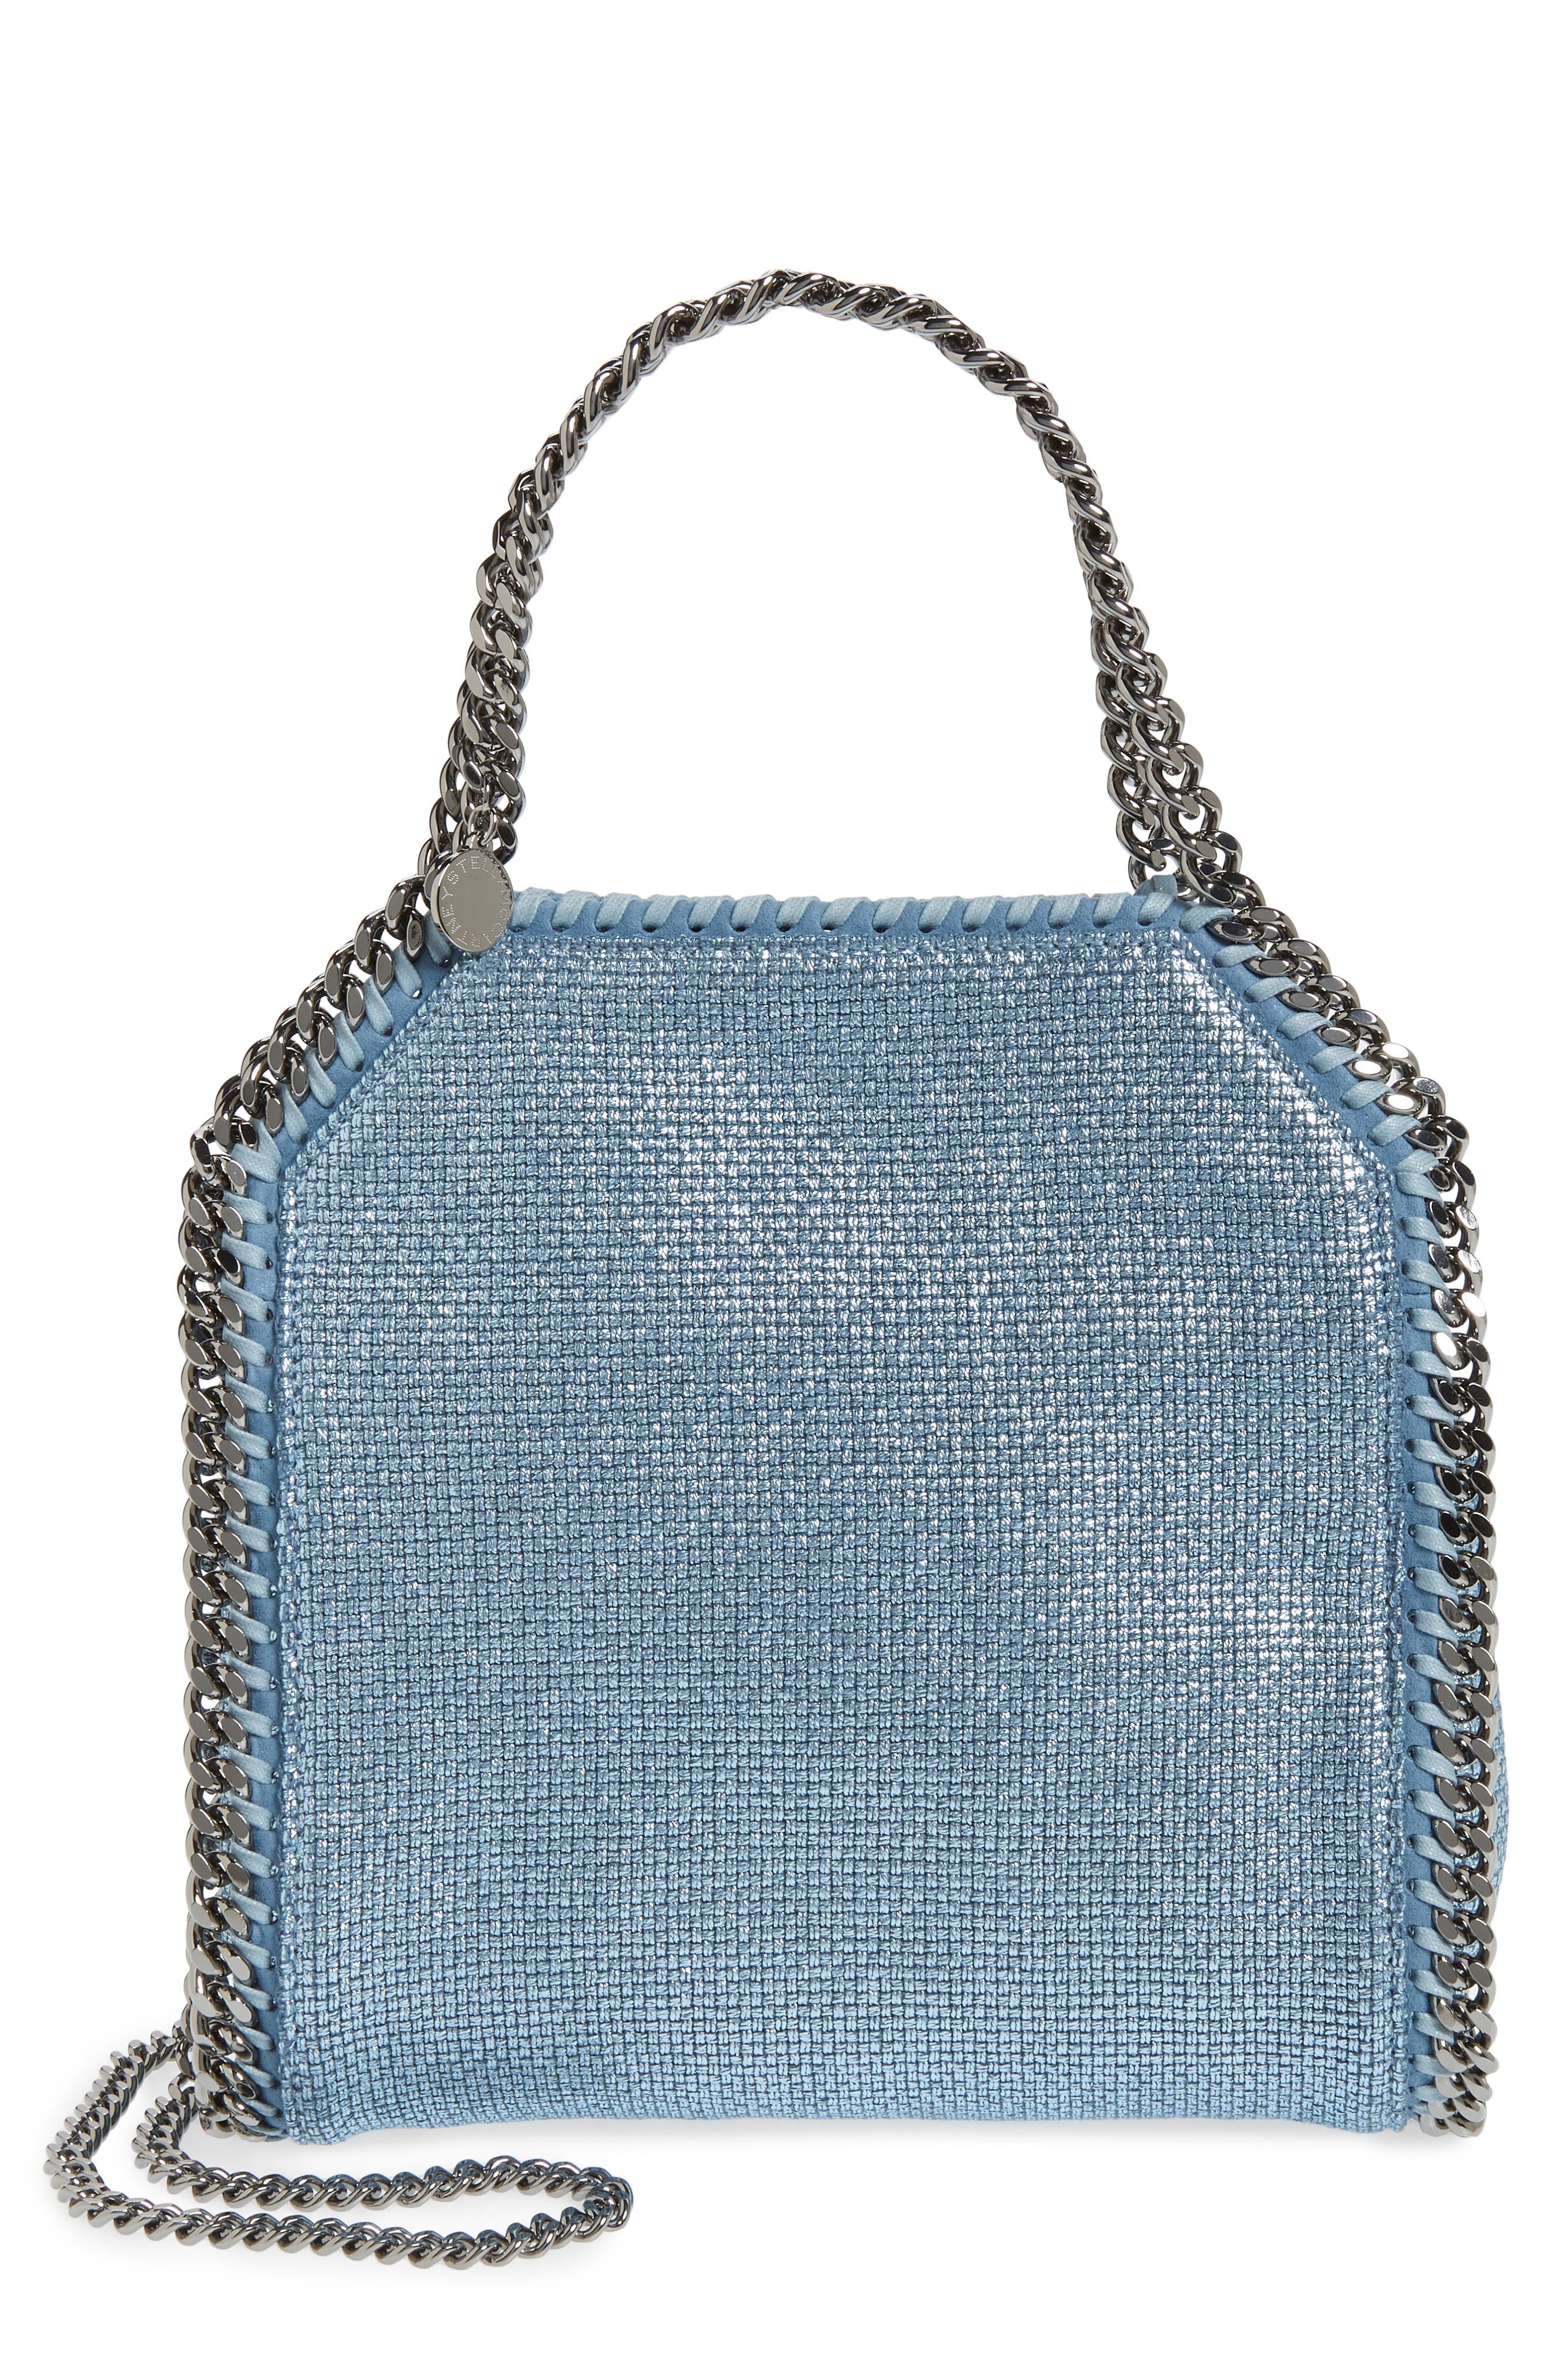
We use fashion captioning dataset as a sample dataset in this tutorial. The following are examples of descriptions and image urls from the dataset. We also include a preview of each image.
Description |
Image URL |
Preview |
|---|---|---|
subtly futuristic and edgy this liquid metal cuff bracelet is shaped from sculptural rectangular link |
https://n.nordstrommedia.com/id/sr3/ |
|
high quality leather construction defines a hearty boot one-piece on a tough lug sole |
https://n.nordstrommedia.com/id/sr3/ |
|
this shimmering tricot knit tote is traced with decorative whipstitching and diamond cut chain the two hallmark of the falabella line |
https://n.nordstrommedia.com/id/sr3/ |
|
… |
… |
… |
You can use the following script to transform the first three entries of the dataset to a DocumentArray and push it to the cloud using the name fashion-sample.
from docarray import Document, DocumentArray

train_da = DocumentArray(
    [
        Document(
            chunks=[
                Document(
                    content='subtly futuristic and edgy this liquid metal cuff bracelet is shaped from sculptural rectangular link',
                    modality='text',
                ),
                Document(
                    uri='https://n.nordstrommedia.com/id/sr3/58d1a13f-b6b6-4e68-b2ff-3a3af47c422e.jpeg',
                    modality='image',
                ),
            ],
        ),
        Document(
            chunks=[
                Document(
                    content='high quality leather construction defines a hearty boot one-piece on a tough lug sole',
                    modality='text',
                ),
                Document(
                    uri='https://n.nordstrommedia.com/id/sr3/21e7a67c-0a54-4d09-a4a4-6a0e0840540b.jpeg',
                    modality='image',
                ),
            ],
        ),
        Document(
            chunks=[
                Document(
                    content='this shimmering tricot knit tote is traced with decorative whipstitching and diamond cut chain the two hallmark of the falabella line',
                    modality='text',
                ),
                Document(
                    uri='https://n.nordstrommedia.com/id/sr3/1d8dd635-6342-444d-a1d3-4f91a9cf222b.jpeg',
                    modality='image',
                ),
            ],
        ),
    ]
)
train_da.push('fashion-sample')
The full dataset has been converted to clip-fashion-train-data and clip-fashion-eval-data and pushed to the cloud which can be directly used in Finetuner.
Start Finetuner#
You may now create and run a fine-tuning job after login to Jina ecosystem.
import finetuner

finetuner.login()
run = finetuner.fit(
    model='ViT-B-32::openai',
    run_name='clip-fashion',
    train_data='clip-fashion-train-data',
    eval_data='clip-fashion-eval-data',  # optional
    epochs=5,
    learning_rate=1e-5,
    loss='CLIPLoss',
    to_onnx=True,
)
After the job started, you may use status() to check the status of the job.
import finetuner

finetuner.login()
run = finetuner.get_run('clip-fashion')
print(run.status())
When the status is FINISHED, you can download the tuned model to your local machine.
import finetuner

finetuner.login()
run = finetuner.get_run('clip-fashion')
run.save_artifact('clip-model')
You should now get a zip file containing the tuned model named clip-fashion.zip under the folder clip-model.
Use the Model#
After unzipping the model you get from the previous step, a folder with the following structure will be generated:
.
└── clip-fashion/
    ├── config.yml
    ├── metadata.yml
    ├── metrics.yml
    └── models/
        ├── clip-text/
        │   ├── metadata.yml
        │   └── model.onnx
        ├── clip-vision/
        │   ├── metadata.yml
        │   └── model.onnx
        └── input-map.yml
Since the tuned model generated from Finetuner contains richer information such as metadata and config, we now transform it to simpler structure used by CLIP-as-service.
Firstly, create a new folder named
clip-fashion-casor name of your choice. This will be the storage of the models to use in CLIP-as-service.Secondly, copy the textual model
clip-fashion/models/clip-text/model.onnxinto the folderclip-fashion-casand rename the model totextual.onnx.Similarly, copy the visual model
clip-fashion/models/clip-vision/model.onnxinto the folderclip-fashion-casand rename the model tovisual.onnx.
This is the expected structure of clip-fashion-cas:
.
└── clip-fashion-cas/
    ├── textual.onnx
    └── visual.onnx
In order to use the fine-tuned model, create a custom YAML file finetuned_clip.yml like below. Learn more about Flow YAML configuration and clip_server YAML configuration.
jtype: Flow
version: '1'
with:
  port: 51000
executors:
  - name: clip_o
    uses:
      jtype: CLIPEncoder
      metas:
        py_modules:
          - clip_server.executors.clip_onnx
      with:
        name: ViT-B-32::openai
        model_path: 'clip-fashion-cas' # path to clip-fashion-cas
    replicas: 1
You can use finetuner.describe_models() to check the supported models in finetuner, you should see:
                                                                Finetuner backbones
┏━━━━━━━━━━━━━━━━━━━━━━━━━━━━━━━━━━━━━━━━━━━━━━━━━━┳━━━━━━━━━━━━━━━━┳━━━━━━━━━━━━┳━━━━━━━━━━━━━━┳━━━━━━━━━━━━━━━━━━━━━━━━━━━━━━━━━━━━━━━━━━━━━━━━━━━━━━━━━━━━┓
┃                                             name ┃           task ┃ output_dim ┃ architecture ┃                                                description ┃
┡━━━━━━━━━━━━━━━━━━━━━━━━━━━━━━━━━━━━━━━━━━━━━━━━━━╇━━━━━━━━━━━━━━━━╇━━━━━━━━━━━━╇━━━━━━━━━━━━━━╇━━━━━━━━━━━━━━━━━━━━━━━━━━━━━━━━━━━━━━━━━━━━━━━━━━━━━━━━━━━━┩
│                                  bert-base-cased │   text-to-text │        768 │  transformer │ BERT model pre-trained on BookCorpus and English Wikipedia │
│                     openai/clip-vit-base-patch16 │  text-to-image │        512 │  transformer │                         CLIP base model with patch size 16 │
│                     openai/clip-vit-base-patch32 │  text-to-image │        512 │  transformer │                                            CLIP base model │
│                openai/clip-vit-large-patch14-336 │  text-to-image │        768 │  transformer │                        CLIP large model for 336x336 images │
│                    openai/clip-vit-large-patch14 │  text-to-image │       1024 │  transformer │                        CLIP large model with patch size 14 │
│                                  efficientnet_b0 │ image-to-image │       1280 │          cnn │                    EfficientNet B0 pre-trained on ImageNet │
│                                  efficientnet_b4 │ image-to-image │       1792 │          cnn │                    EfficientNet B4 pre-trained on ImageNet │
│                                    RN101::openai │  text-to-image │        512 │  transformer │                            Open CLIP "RN101::openai" model │
│                          RN101-quickgelu::openai │  text-to-image │        512 │  transformer │                  Open CLIP "RN101-quickgelu::openai" model │
│                         RN101-quickgelu::yfcc15m │  text-to-image │        512 │  transformer │                 Open CLIP "RN101-quickgelu::yfcc15m" model │
│                                   RN101::yfcc15m │  text-to-image │        512 │  transformer │                           Open CLIP "RN101::yfcc15m" model │
│                                      RN50::cc12m │  text-to-image │       1024 │  transformer │                              Open CLIP "RN50::cc12m" model │
│                                     RN50::openai │  text-to-image │       1024 │  transformer │                             Open CLIP "RN50::openai" model │
│                            RN50-quickgelu::cc12m │  text-to-image │       1024 │  transformer │                    Open CLIP "RN50-quickgelu::cc12m" model │
│                           RN50-quickgelu::openai │  text-to-image │       1024 │  transformer │                   Open CLIP "RN50-quickgelu::openai" model │
│                          RN50-quickgelu::yfcc15m │  text-to-image │       1024 │  transformer │                  Open CLIP "RN50-quickgelu::yfcc15m" model │
│                                  RN50x16::openai │  text-to-image │        768 │  transformer │                          Open CLIP "RN50x16::openai" model │
│                                   RN50x4::openai │  text-to-image │        640 │  transformer │                           Open CLIP "RN50x4::openai" model │
│                                  RN50x64::openai │  text-to-image │       1024 │  transformer │                          Open CLIP "RN50x64::openai" model │
│                                    RN50::yfcc15m │  text-to-image │       1024 │  transformer │                            Open CLIP "RN50::yfcc15m" model │
│                          ViT-B-16::laion400m_e31 │  text-to-image │        512 │  transformer │                  Open CLIP "ViT-B-16::laion400m_e31" model │
│                          ViT-B-16::laion400m_e32 │  text-to-image │        512 │  transformer │                  Open CLIP "ViT-B-16::laion400m_e32" model │
│                                 ViT-B-16::openai │  text-to-image │        512 │  transformer │                         Open CLIP "ViT-B-16::openai" model │
│                 ViT-B-16-plus-240::laion400m_e31 │  text-to-image │        640 │  transformer │         Open CLIP "ViT-B-16-plus-240::laion400m_e31" model │
│                 ViT-B-16-plus-240::laion400m_e32 │  text-to-image │        640 │  transformer │         Open CLIP "ViT-B-16-plus-240::laion400m_e32" model │
│                            ViT-B-32::laion2b_e16 │  text-to-image │        512 │  transformer │                    Open CLIP "ViT-B-32::laion2b_e16" model │
│                          ViT-B-32::laion400m_e31 │  text-to-image │        512 │  transformer │                  Open CLIP "ViT-B-32::laion400m_e31" model │
│                          ViT-B-32::laion400m_e32 │  text-to-image │        512 │  transformer │                  Open CLIP "ViT-B-32::laion400m_e32" model │
│                                 ViT-B-32::openai │  text-to-image │        512 │  transformer │                         Open CLIP "ViT-B-32::openai" model │
│                ViT-B-32-quickgelu::laion400m_e31 │  text-to-image │        512 │  transformer │        Open CLIP "ViT-B-32-quickgelu::laion400m_e31" model │
│                ViT-B-32-quickgelu::laion400m_e32 │  text-to-image │        512 │  transformer │        Open CLIP "ViT-B-32-quickgelu::laion400m_e32" model │
│                       ViT-B-32-quickgelu::openai │  text-to-image │        512 │  transformer │               Open CLIP "ViT-B-32-quickgelu::openai" model │
│                             ViT-L-14-336::openai │  text-to-image │        768 │  transformer │                     Open CLIP "ViT-L-14-336::openai" model │
│                                 ViT-L-14::openai │  text-to-image │        768 │  transformer │                         Open CLIP "ViT-L-14::openai" model │
│                                        resnet152 │ image-to-image │       2048 │          cnn │                          ResNet152 pre-trained on ImageNet │
│                                         resnet50 │ image-to-image │       2048 │          cnn │                           ResNet50 pre-trained on ImageNet │
│ sentence-transformers/msmarco-distilbert-base-v3 │   text-to-text │        768 │  transformer │                    Pretrained BERT, fine-tuned on MS Marco │
└──────────────────────────────────────────────────┴────────────────┴────────────┴──────────────┴───────────────────────────────────────────────────────────
You can now start the clip_server using fine-tuned model to get a performance boost:
python -m clip_server finetuned_clip.yml
That’s it, enjoy 🚀


